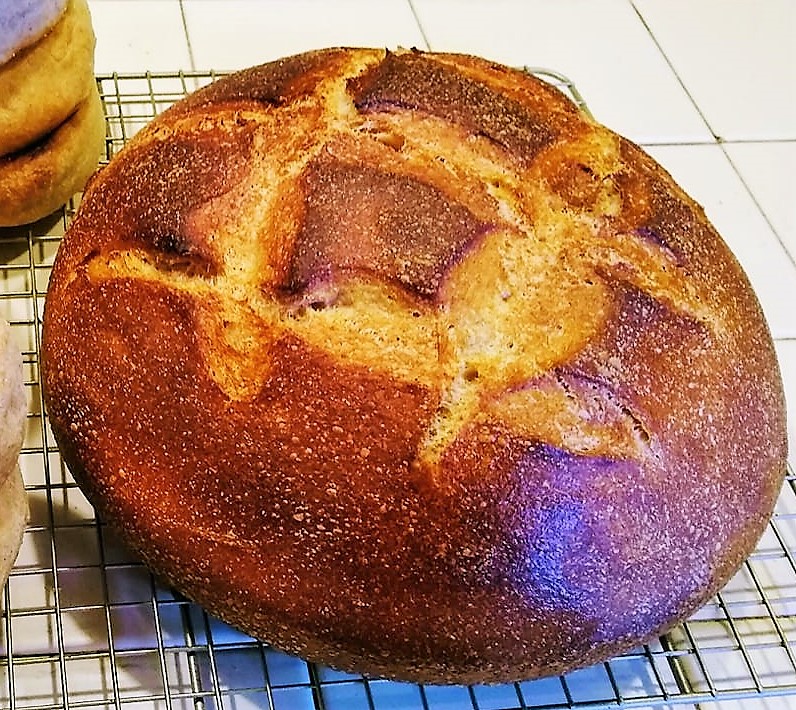
An incredible bakery in my area makes a seasonal “pain levain” with apple cider in it. Pain Levain, if you’re not familiar, is just a slightly dense, lightly tangy sourdough bread that’s typically baked in a traditional round boule shape. Adding cider to the dough doesn’t make a sweet bread, but it does give a slight boost to the fermentation to help the bread rise; it also gives a little extra complexity to the flavor (that sort of “Hm, what is that?” note) and in my experience, helps with the browning of the crust, probably because of the natural sugars in the cider.
Typically pain levain is made with all white flour, but I decided to try this recipe a bit heavier on the whole wheat side, and it works great. This boule does not last long in my house — as soon as it’s cut, I give it 24-36 hours maximum before it’s devoured.
1 cup sourdough sponge*
1 cup apple cider
2 cups white whole wheat flour
1 1/2 cups all-purpose flour, plus more for kneading
1 1/2 tsp. kosher salt
*The sponge is what you get after you’ve fed your sourdough starter and let it sit to get active and bubbly (I generally recommend 8-12 hours for this step and start mine before I go to bed so I can bake the next morning). Make sure that after you’ve measured out the cup of sponge you need for this recipe, you have at least another cup ready to go into a clean jar and back into the refrigerator to use as your starter next time you bake.
In the bowl of an electric mixer fitted with a dough hook, combine the sourdough sponge and apple cider. Mix briefly on low speed to incorporate, then slowly add the flour and salt. As the flour gets mixed in, gradually increase the speed to high and let the dough work for about 5 minutes, until it’s stretchy and doesn’t immediately break apart when the hook is lifted out of the mixture.
Turn the dough out onto a very lightly floured surface and knead vigorously. You don’t want to incorporate too much additional flour into this — the finished dough should be slightly tacky but not sticky. You want to knead until the dough reaches “windowpane” stage, which is when you pinch off a small piece of the bread dough, hold it up to the light, and stretch it between your fingers. If it can stretch thinly enough to see the light through it (like a windowpane) without breaking, it’s ready. Be patient with this step, as kneading to the right consistency is really important to the finished texture of the bread. I find that after starting it in a mixer and then finishing by hand, I need to knead this dough for about 7-10 minutes to achieve windowpane, but your results will vary.
Transfer the dough to a large, clean bowl. I like glass for this since it makes it easy to see how well the dough is rising. Cover well (hate to say it, but plastic wrap is PERFECT for this) and place in a draft-free spot to rise until doubled, about 4 hours. Don’t rush this step if you can help it; a longer rising time makes for a more flavorful bread.
Gently de-gas the dough (this is what they usually call “punching down,” but I feel like that implies something more forceful than is needed here — just turn it over on itself once or twice to let a little of the air out of it). Shape the risen dough into a round boule and transfer to a well-oiled Dutch oven with a tightly fitting lid. If you don’t have a Dutch oven or another suitable pot, you can transfer the dough to a baking sheet lined with parchment paper.
Cover the dough again (the lid of the pot is a good choice) and let rise for about 2 more hours. You’re not looking for it to double, but it will grow some. You’ll know it’s risen enough when you poke it gently and the indentation of your finger remains.
Preheat your oven to 425 degrees. Make several slashes in the top of the bread.
Bake the bread, covered, at 425 for 25 minutes. Remove the lid from the pot and bake for another 15-20 minutes, until it’s golden brown, crusty, and sounds hollow when tapped. If you’re baking on a sheet rather than in a pot, I recommend misting the dough slightly with water and also putting a shallow dish full of water on the floor of the oven to create steam so you can create a good crust on your bread.
Transfer the bread to a cooling rack and let cool completely to set the structure inside before cutting.